AdminGuide:Service:ScheduledTasks
Return to AdminGuide:Service
Scheduled task management
With this service (introduced in version 4.5.8) you can schedule tasks to be automatically carried out by KalliopePBX following a user-defined planning policy.
The types of tasks that can be scheduled are:
- Send Call Center CDR
- Send CDR (available with firmware version 4.7.0 of later)
Defining a new scheduled task
You can set scheduled tasks on the Operating menu -> Monitoring -> Scheduled tasks page.
To add a new scheduled task click on "Schedule new task"
![]() in the top left after selecting the type of task from the drop-down menu.
in the top left after selecting the type of task from the drop-down menu.
How to create a new scheduled "send Call Center CDR" task
N.B.: This ype of scheduled task requires a Call Center license to be present on the PBX.
Select "Send Call Center CDR" from the drop-down menu and click on "New scheduled task". A form, pictured below, will appear.
The following table lists the parameters that need to be configured:
General settings
| ||
|---|---|---|
| Parameter | Description | Value |
-
| ||
| Name | The name assigned to the scheduled task. This name will appear in the subject line and the body of the emails sent upon completion. | Alpha-numeric |
| Enabled | Enable or disable the scheduled task. Disabled tasks will only be carried out manually. | Yes / No |
| Type of schedule | Select how often the ask will be carried out | Daily / Weekly / Monthly |
| Scheduled time | Select the time at which the task will be carried out and and the result sent via email to the configured addresses. | Hours and minutes |
| Day of the week | Only available if the schedule is set to "Weekly". Lets you set the day of the week on which the task will be carried out (at the time selected above) and the reult sent via email to the configured addresses. | Day of the week |
| Day of the mnth | Only available if the schedule is set to "Monthly". Lets you set the day of the month on which the task will be carried out (at the time selected above) and the reult sent via email to the configured addresses. | Date |
Settings for sending the Call Center CDR
| ||
| Time span | Select the time span based on which you wish to export the Call Center CDR. | Current day / Previous day / Current week / Previous week / Current month / Previous month |
| File format | Select the format of the exported Call Center CDR. | XLSX / XLSX (detailed) / CSV / CSV (detailed) / JSON / XML |
| Export operator events | If selected, this will add all operator events to the exported Call Center CDR. This setting can only be enabled if a "detailed" file type has been selected. | Yes / No |
| Compress if file size exceeds this value in MB (0 = always compress) | Indicate a maximum acceptable file size (in MB); if the file exceeds this, it will be compressed to zip format before being sent as an attachment. If this value is set to 0, the report will always be compressed regardless of its size. | Numeric |
| Notify all supervisors | Select whether or not the exported Call Center CDR will be sent via email to all users with a supervisor role who have a configured email address. | Yes / No |
| Recipients | In conjunction with or as an alternative to notifying the supervisors, you can specify an arbitrary number of recipients to which the exported Call Center CDR will be sent. | Alphanumeric |
N.B.: Either one or more recipients must be set or notifications to supervisors must be enabled, otherwise the form will display an error message and the scheduled task settings will not be saved.
How to create a new scheduled "send CDR" task
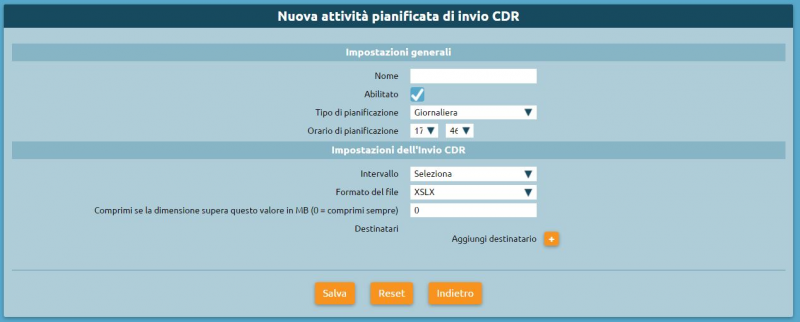
Select "Send CDR" from the drop-down menu and click on "New scheduled task". A form, pictured below, will appear.
The following table lists the parameters that need to be configured:
Impostazioni generali
| ||
|---|---|---|
| Parametro | Descrizione | Valore |
-
| ||
| Nome | Il nome da assegnare all’attività pianificata. Il nome inserito comparirà nell’oggetto e corpo delle mail inviate al termine dell’esecuzione dell’attività | Alfa-numerico |
| Abilitato | Abilitare o disabilitare l'esecuzione dell'attività pianificata. Le attività pianificate disabilitate possono essere eseguite solo manualmente | Si / No |
| Tipo di pianificazione | Selezionare il periodo di esecuzione automatica dell'attività pianificata | Giornaliera / Settimanale / Mensile |
| Orario di pianificazione | Permette di indicare l'orario in cui ogni giorno l'attività pianificata sarà eseguita ed il risultato inviato via email ai destinatari impostati | ora e minuti |
| Giorno della settimana | Disponibile solo nel caso in cui il tipo di pianificazione sia "Settimanale". Permette di indicare il giorno della settimana nel quale l'attività pianificata sarà eseguita (all'ora impostata) ed il risultato inviato via email ai destinatari impostati | Giorno della settimana |
| Giorno del mese | Disponibile solo nel caso in cui il tipo di pianificazione sia "Mensile". Permette di indicare il giorno del mese nel quale l'attività pianificata sarà eseguita (all'ora impostata) ed il risultato inviato via email ai destinatari impostati | Data |
Impostazioni dell'Invio CDR
| ||
| Intervallo | Selezionare l'intervallo di tempo sulla base del quale si desidera esportare il CDR | Giorno corrente / Giorno precedente / Settimana corrente / Settimana precedente / Mese corrente / Mese precedente |
| Formato del file | Selezionare il formato del file nel quale il CDR deve essere esportato | XLSX / XLSX (dettagliato) / CSV / CSV (dettagliato) / JSON / XML |
| Comprimi se la dimensione supera questo valore in MB (0 = comprimi sempre) | Indicare una dimensione massima accettabile (in MB) del file generato dal processo di esportazione CDR, superata la quale il file verrà compresso in formato zip prima di allegarlo alla email. Se si indica il valore 0 il file viene compresso sempre, indipendentemente dalla sua dimensione. | Numerico |
| Destinatari | È possibile specificare un numero arbitrario di destinatari ai quali inviare il CDR esportato, deve però essere sempre presente almeno un destinatario | Alfanumerico |
Esecuzione manuale delle attività pianificate
Tra le azioni disponibili per le attività pianificate definiti c'è la possibilità di eseguirle su richiesta senza dover attendere la pianificazione impostata. Per avviare l'attività in background basta fare click sul pulsante con il simbolo
![]() .
.
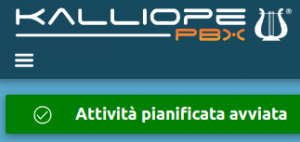
Al termine della richiesta si viene avvisati con un messaggio che la generazione del report è stata avviata.


