Differenze tra le versioni di "AdminGuide:Service:FaxModule/en"
| Riga 67: | Riga 67: | ||
* time of sending if required (otherwise the fax will be sent immediately) | * time of sending if required (otherwise the fax will be sent immediately) | ||
* addressee | * addressee | ||
* pdf file to be sent | * pdf file to be sent (pdf, doc, docx, odt are supported) | ||
[[File:InviaFAX.png]] | [[File:InviaFAX.png]] | ||
Versione delle 10:15, 11 feb 2022
Return to AdminGuide:Service
Fax service
Description
The fax service lets Kalliope users send and receive faxes from their user portal on the web GUI or via email.
The service requires the purchase of a KPBX-V4-FAX license. Each license channel allows the configuration of one fax entity. A fax entity is conceptually equivalent to a physical fax machine that can be accessed by one or more users.
Configuration
To configure the service, you must define the settings for simultaneity and archival of sent and received files (including reports). You can do this on the Fax -> Fax settings page.
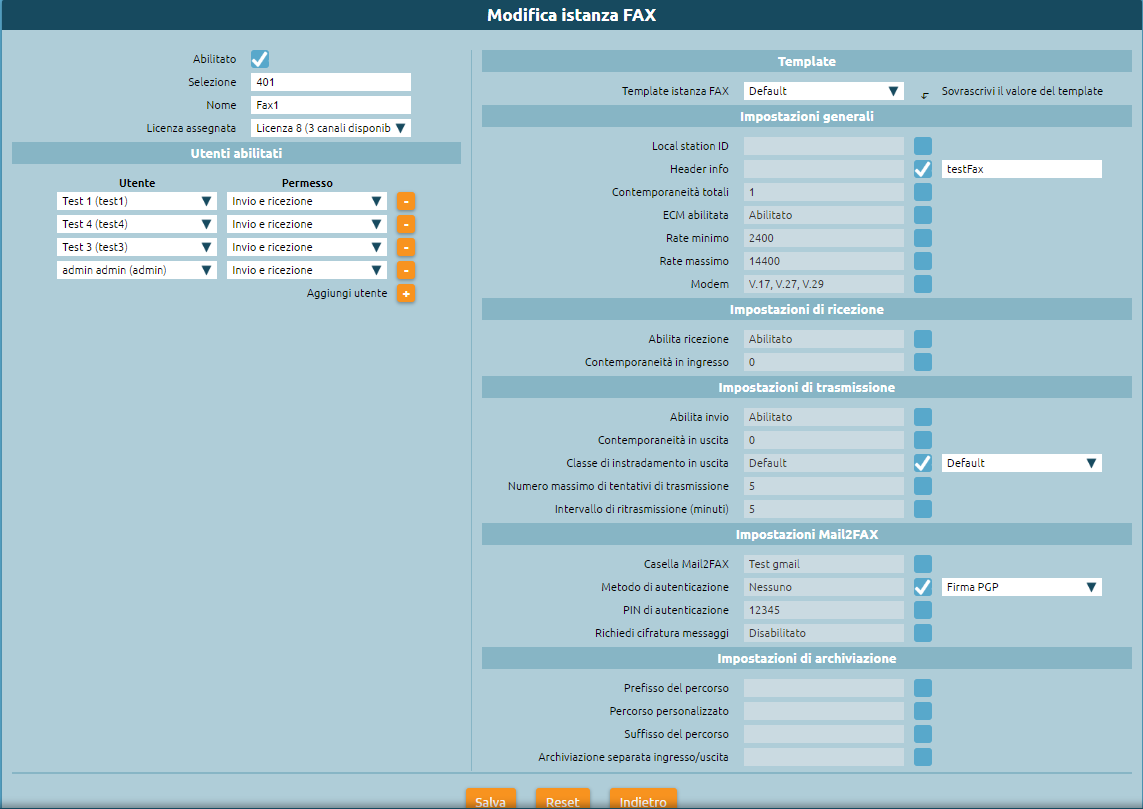
You will then need to configure the fax entity in the Fax -> Fax entities page.
For each entity you will need to set the following parameters:
- Name
- Numeric selection (extension) associated with the entity; this selection will be automatically inserted in the numbering plan
- Users enabled to use the entity (specifying send and/or receive permissions)
- Configuration template for the fax settings for sending/reception and archival
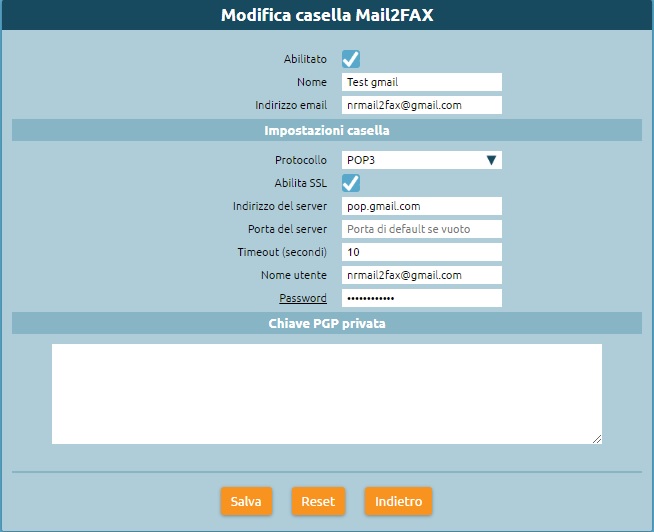
To configure the MAIL2FAX, go to the Fax -> Fax entities page and select the list of Mail2Fax boxes and add a new one.
You must then fill the following fields:
- Name
- Email address
- Mailbox settings
- Username
- Password
- Private PGP key (insert only if sending encrypted faxes ).
Save the settings and apply the changes.
Using the service
Fax module
Every user with send/receive permissions for a fax entity can view the Fax -> Fax module page.
In this module, you can:
- view the status of all received faxes and download the received file
- view the status of all sent faxes and download the sent file and the sending report
Sending a fax
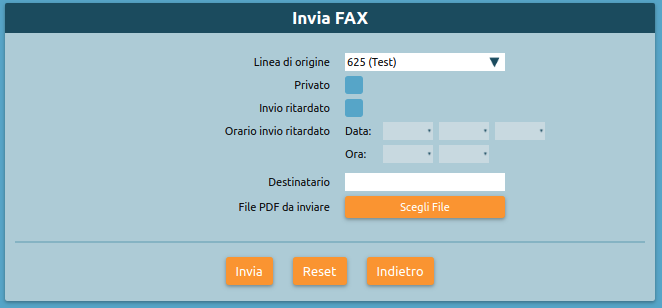
Each user with send permissions for one or more fax entities can view the Fax -> Send fax page.
From this page, you can set the options for sending faxes:
- origin line (corresponds to the created entity)
- time of sending if required (otherwise the fax will be sent immediately)
- addressee
- pdf file to be sent (pdf, doc, docx, odt are supported)
Click on Send fax to send the fax.
You will be notified via email for each sent fax with the report attached.
MAIL2FAX
Each fax entity must have an associated Mail2Fax box. in the ax entity settings page, select the Mail2Fax settings:
- Mail2FAX box: name of the previously created mailbox
- Authentication method:
- None: the fax will be sent and received with no authentication
- PIN: the fax is authenticated with a PIN that must he inserted in the text of the mail
- PGP signature: the fax is authenticated with a private key
- Request message encryption: enable or disable.
You must insert the email from which faxes will be sent so that the addressee can be recognized and not discarded. From the Users and roles page, select Edit user and insert the email.
You must also insert the email of the sender, from which the faxe will be sent, so that it can be recognized and not discarded by the system. From the Users and roles page, select Edit user and insert the email. Then from the Users and Roles page go to settings for the user that manages the fax entity and insert the email address from which the mailFax should be sent. Select 'edit user' and insert the email in the corresponding field. The same email address must not be used for multiple users (even if they belong to different tenants), otherwise the email will not be correctly sent and/or received.
It is now possible to send an email with the fax attached from the email box. The email must have:
- in the Subject field, the phone number to which to send the fax (you can also write the entity to which to send the fax by entering PnoeNumber@entity)
- in the To: field, the email to which to send the fax, i.e. the one associated with the entity
- in the body, the fax PIN if PIN authentication was selected
- as an attachment, the PDF file to be sent
If the fax is successfully sent, the Fax module page will display the outcome of the transition and an email will be sent to the sender.
Receiving a fax
Each user with receive permission for a fax entity will receive an email notification with the document attached.
They can also view the status of all received faxes and download the document from the Fax module.


